What is OpenJDK?
Every Java Developer is using OpenJDK. This makes OpenJDK the most impactful project for Java Developers. OpenJDK is the open-source Java SE implementation. Oracle is the biggest contributor. But many other companies are part of the project, like Red Hat, SAP, Google, BellSoft and many more.
How to start contribution in OpenJDK
Sign Oracle Contributor Agreement to start contribution. Scan it and e-mail the result to oracle-ca_us(at)oracle.com
Although the page says it takes 2 weeks, for me it was fast. I did some mistakes in the form and Oracle’s team helped me to submit it again. It might take a couple of days. Meanwhile, you can prepare your development env ready for contribution.
Prepare your development env
JDK GutHub repo provides steps to set up your development env. This is the link from JDK source repository. From this link Instructions for the Impatient are:
-
Get the source code:
git clone https://github.com/openjdk/jdk/ -
Run configure: bash configure
If configure command fails, it prints a suggestion on how to resolve that on your machine. Follow the instructions, and try running bash configure again.
-
Run make: make images
-
Verify your newly built JDK: ./build/*/images/jdk/bin/java -version
-
Run basic tests: make run-test-tier1
In case you get stuck anywhere in the above steps, you can find a solution on the same page. And it is ok to get stuck when you set up this first time, as it needs some libraries etc.
2 Problems I faced are:
1.  Failure in the configure command, it failed due to some external libraries missing.

2.  Failure while running tests.
For problem 1, I got a message on the console saying install a set of libraries. It worked after installing those.
Initially, I tried below, it failed due to case mismatch, it should have been libx11-dev not libX11-dev:
sudo apt-get install libX11-dev libxext-dev libxrender-dev libxtst-dev libxt-dev
This one worked!
sudo apt-get install libx11-dev libxext-dev libxrender-dev libxtst-dev libxt-dev
For problem 2, found below on the same page:
“Most of the JDK tests are using the JTReg test framework. Make sure that your configuration knows where to find your installation of JTReg. If this is not picked up automatically, use the –with-jtreg=
I have jtreg source code as well so in my case this option was something like this: –with-jtreg=/home/vipin/IdeaProjects/jtreg/build/images/jtreg
Once your setup is successful and you execute tests, the result will be something like this:
At the end of the test you will see below output:
==============================
Test summary
==============================
   TEST                                              TOTAL  PASS  FAIL ERROR
   jtreg:test/hotspot/jtreg:tier1                     1481  1481     0     0
   jtreg:test/jdk:tier1                               1894  1894     0     0
   jtreg:test/langtools:tier1                         4027  4027     0     0
   jtreg:test/nashorn:tier1                              0     0     0     0
   jtreg:test/jaxp:tier1                                 0     0     0     0
==============================
TEST SUCCESS

Formatted output:

==============================
Test summary
==============================
   TEST                                              	TOTAL  PASS  FAIL ERROR
   jtreg:test/hotspot/jtreg:tier1                     1481  	1481     0     0
   jtreg:test/jdk:tier1                               1894  	1894     0     0
   jtreg:test/langtools:tier1                         4027  	4027     0     0
   jtreg:test/nashorn:tier1                             0     0     0     0
   jtreg:test/jaxp:tier1                                 0     0     0     0
==============================
TEST SUCCESS
Setting up the project in IDE
After this, you may want to setup JDK project in IDE. I use IntelliJ, and we have a shell script idea.sh comes along with jdk to setup a project for you. I wanted to setup module java.base, executed following command from my base directory.
./bin/idea.sh java.base
In case you want to set up all modules then run idea.sh.
Testing your change using JTREG
Two ways you can run JTREG tests, command line and GUI.
Using the command line
The following command will run all the tests in the test/jdk/java/lang/Appendable/ and its sub-folders.
/home/vipin/IdeaProjects/newjdk/jdk$ /home/vipin/IdeaProjects/jtreg/build/images/jtreg/lib/jtreg.jar -jdk:/home/vipin/IdeaProjects/newjdk/jdk/build/linux-x86_64-server-release/jdk/ test/jdk/java/lang/Appendable/
Following command is running individual test file Basic.java
/home/vipin/IdeaProjects/jtreg/build/images/jtreg/lib/jtreg.jar -jdk:/home/vipin/IdeaProjects/newjdk/jdk/build/linux-x86_64-server-release/jdk/ test/jdk/java/lang/Appendable/Basic.java
JTREG GUI
export JT_JAVA=/home/vipin/IdeaProjects/newjdk/jdk/build/linux-x86_64-server-release/jdk
vipin:/home/vipin/IdeaProjects/newjdk/jdk$ /home/vipin/IdeaProjects/jtreg/build/images/jtreg/bin/jtreg -g -jdk:$JT_JAVA -agentvm -automatic -verbose:summary -exclude:./test/jdk/ProblemList.txt test/jdk/
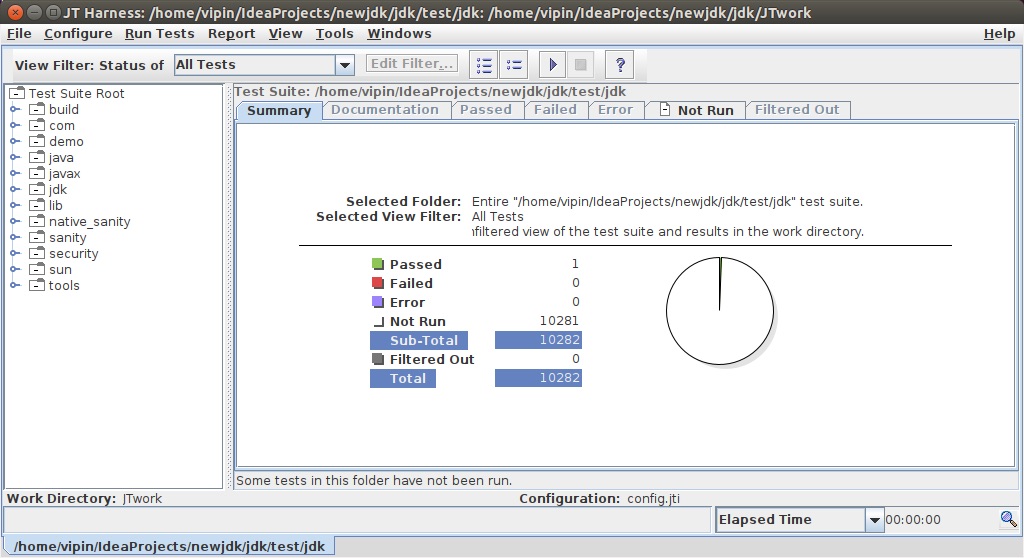
Following is JTREG GUI on my system
In the above command test/jdk/ dir has TEST.ROOT file, below directories have TEST.ROOT
vipin:/home/vipin/IdeaProjects/newjdk/jdk$ find . -name TEST.ROOT
./test/lib-test/TEST.ROOT
./test/jaxp/TEST.ROOT
./test/langtools/TEST.ROOT
./test/failure_handler/test/TEST.ROOT
./test/jdk/TEST.ROOT
./test/hotspot/jtreg/TEST.ROOT
./make/langtools/test/TEST.ROOT
Preparing patch
After fixing some issue you need to prepare patch using webrev.ksh
First step is to copy webrev.sh in jdk source directory and then execute following command, it generates webrev dir and webrev.zip file in the same directory.
ksh ./webrev.ksh
After creating a patch you need the bug id to submit it against that bug. Send an email to the corresponding email list. Initially, someone should sponsor your fix and create a bug id for you.
Once you have bug id, submit a review request. The review request should be marked as such: “RFR : “
e.g. RFR 8240524: Removed warnings from test classes
You can not attach anything and send it to the email list. If this is a small patch then you can add patch text in an email or talk to sponsor how do they want to accept it.
Two important things I learned in initial commits
- Update copyright year in files, there can be 2 formats for the year in files, it should be updated as follows:
Copyright (c) 1999 ---> Copyright (c) 1999, 2020 Copyright (c) 1999, 2016 ---> Copyright (c) 1999, 2020 - A significant portion of code in package jdk.internal.icu comes from an upstream project, ICU4J. Changes in these packages should be done at upstream.
At the end
Follow me on twitter @vipinbit to get daily tips like this on Java Language Features.
Resources
- https://openjdk.java.net/guide/index.html
- https://github.com/openjdk/jdk/
- https://openjdk.java.net/contribute/
- https://openjdk.java.net/bylaws#_7
- https://adoptopenjdk.gitbooks.io/adoptopenjdk-getting-started-kit/content/en/
- https://www.youtube.com/watch?v=dzm4EqLuuNQ from @brjavaman and @DavidBuckJP